Tactical theory: the various forms of rest-defence
Ever since Jose Mourinho arrived in England, the importance of the transition phases has increased massively. From the 2010’s onwards this importance has only increased by the likes of Jürgen Klopp and Pep Guardiola who helped to revolutionise attacking and defensive transitions and bring the game of football to a new level.
With an increasing amount of goals being scored through counterattacks, the importance of the transition phases is often more recognised and appreciated. Teams look to organise their teams structure in a way that enables them to be dominant in all phases of the game. One of the vital parts in achieving this dominance is a well structured restdefence.
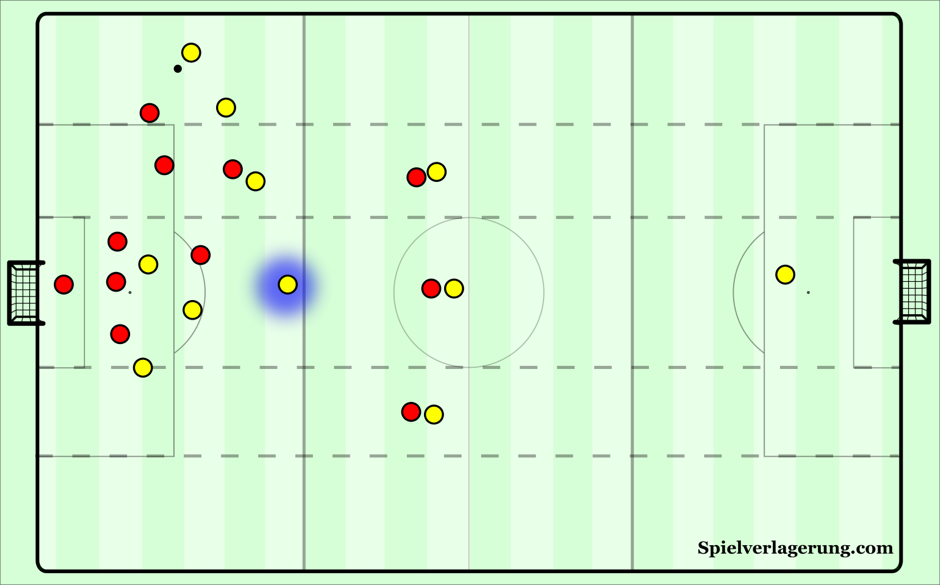
Restfeldsicherung (spare field coverage) is the term used by the DFB when describing restdefence with its origins from Germany. Restfeldsicherung translates to having players positioned in deeper areas of the field when in possession with the means of controlling defensive spaces in case of an opposition counterattack. These players are positioned in optimal locations/spaces to control the game by limiting opposition counterattacks simultaneously supporting teammates in possession for combinations and recirculation. This is done by maintaining a structure in areas behind the ball against ‘opposition attack protection’ whilst the team are attacking in the final third.
When setting up a restdefence structure, a team will always have players in predetermined positions creating a balance to give them better opportunities in transition moments to prevent the opposition countering to goal. The players positioned in the space between the defensive and attacking line will usually look to cover the three central channels, making passes through the team’s structure more difficult in transitional moments. This is because the centre of the field strategically holds higher value than wider areas due to the position of the goals.
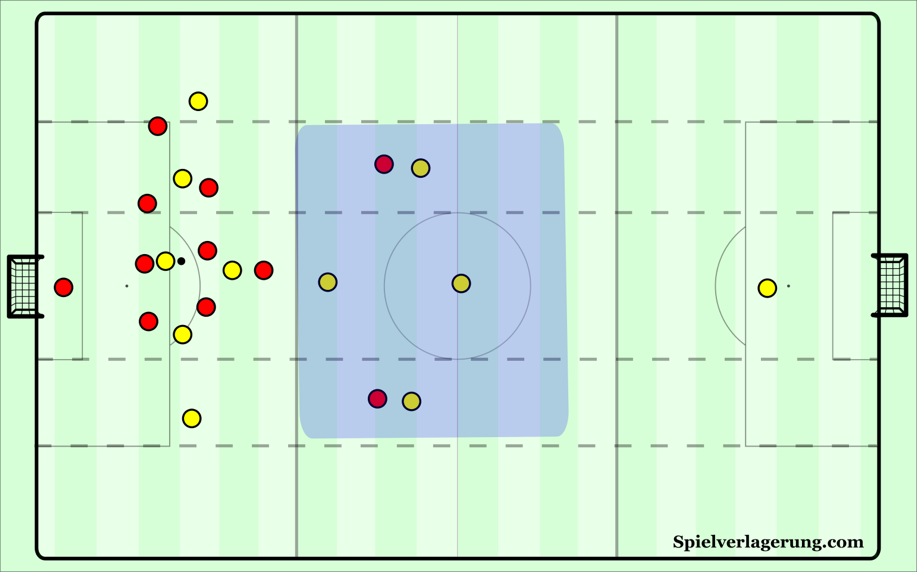
By structuring the restdefence in a proper way, a team can achieve dominance over their opponents transition and consequently diminish the threat of the opponent breaking out through counter attacks. This restdefence structure can be created in numerous ways, depending on the formation used during the attacking stage, the game model implemented by the coach and the qualities of the individual players. However, there are certain commonalities that all restdefences adhere to. One of the similarities that all restdefences share is a layering within the structure. Each layer has different functions that relate to how teams deal with transitions.
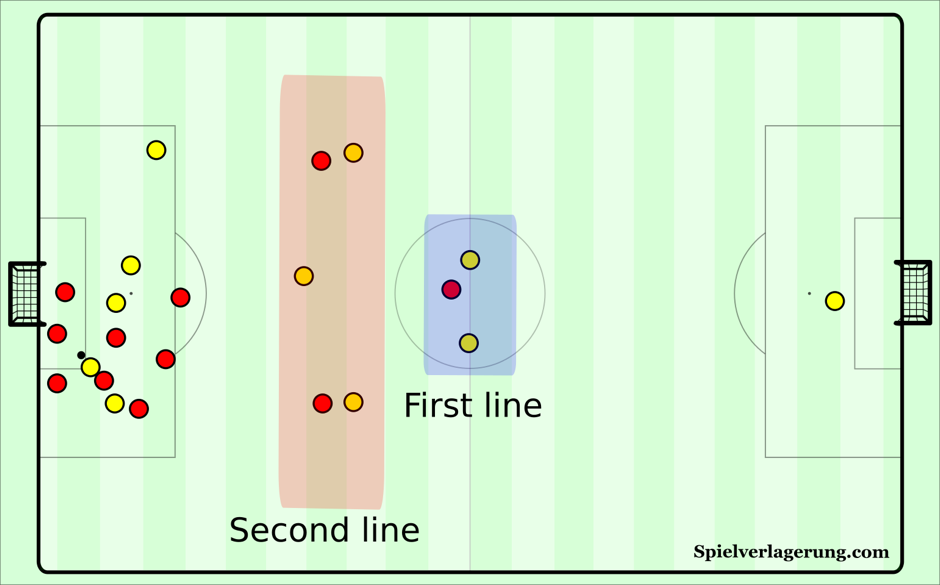
The second line of a restdefence is organised to get immediate access to the ball when the opposition win it. By organising this line just behind the attacking line, they are able to immediately press the ball. This can either be in a counterpressing structure, in which the other nearby players also collapse onto the ball or it can be used to provide initial pressure onto the ball in order to take out a direct passes in behind, allowing the rest of the team to fall back into their defensive positions. Therefore, the organisation of the second line also depends on the philosophy of the coach and the game model of the team. When the team wants to play with aggressive counterpressing, they also need a sufficient number of players in the second line, in order to have good access to the ball. When fewer players are positioned in this line, the direct access to the new ball carrier diminishes.
The second line has a lot of responsibility as they are there to add defensive stability, collect the loose balls to sustain attacks and control the centre. They also have to keep a near perfect spacing between the defenders and attacking units, enabling them to stay connected both in and out of possession. Doing so enables positional balance and will help them maintain access in optimal distances for pressing. Therefore there is a lot of emphasis on the spacing always being perfect to help maximise the success of controlling the opponent’s transition.
The first line is usually positioned at the halfway line, and often consists of the central defenders. The aim of this line is to provide cover for the second line, with good body orientation to either defend any direct balls that are played in behind or step forward against vertical pass entries. The reason this line is positioned at the halfway line is a simple one: the opposition’s attackers can’t be offside in their own half, therefore the opposition’s striker will usually stay just in front of the halfway line. The defenders will have to stay behind him, otherwise after a loss of possession a direct pass to him would result in a direct scoring chance.
Usually, players in the first line will move in relation to the second line and ensure spaces are not generated within the team’s structure to maintain compaction. The more players positioned in this line, the more security a team has to defend through balls and to organise the defensive structure once they are pushed into their own half. However, the players that are positioned in this line don’t participate during the attack, and aren’t able to directly press the ball upon losing it. Therefore this line is usually limited to 2-3 players. At times, restdefences even consist of three lines. When that’s the case, usually the second line of the restdefence has been split-up into two different lines. The reasons teams choose to do this will be discussed throughout the article.
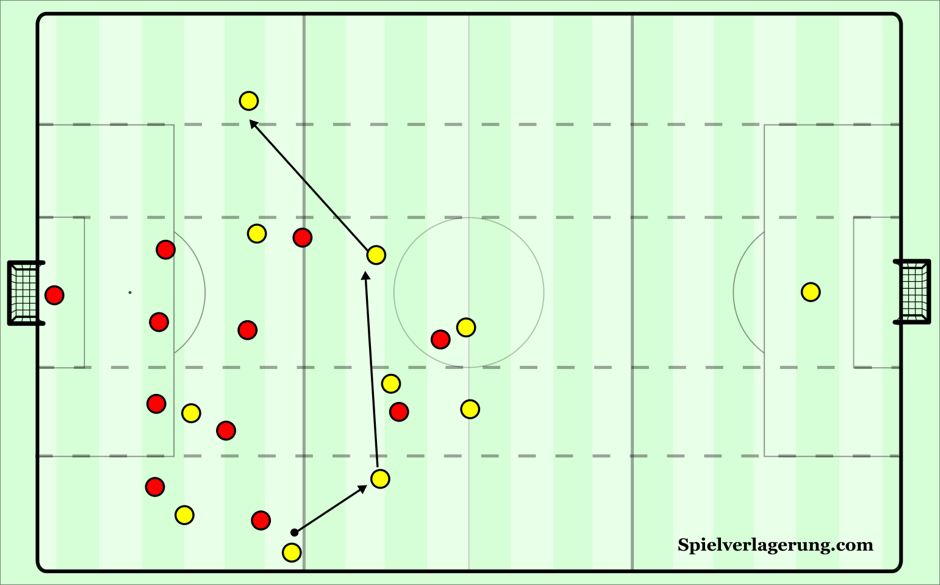
Another similarity consists of the width used by most restdefences structures. As Adin Osmanbasic pointed out in his article on counterattacks, most counters are created using the halfspaces as maximum width. Using the outer-wings during counter attacks simply makes the distance the ball has to travel too big and therefore it’s less efficient, as defensive teams can collapse into defensive organisation. Consequently, restdefence shapes look to prioritise the centre and halfspaces, while the space on the wings are usually left uncovered. This is also beneficial for the structure while the team is in possession. When the team isn’t able to continue playing over one of the sides, they will look to switch the point of attack to the far-side through one of the players positioned within the restdefence structure. By placing these players in halfspace/centre positions they are able to reach the far-side of the pitch within one or two passes. If these players were to be positioned in the outer corridor they wouldn’t be able to switch the play as effectively and teams could easily get stuck on one side of the pitch, which makes it easier to defend against.
In this tactical theory, we will be exploring the different types of restdefence structures depending on the system, how they are organised and their strengths and weaknesses. In addition, we will look at the effective ways to set up counter-attacks against these specific shapes and possession benefits of a strong restdefence while also exploring their opportunities for organizing a good counterpressing.Restdefence structures will be divided into three categories: man-to-man, man-to-man +1, and zonal shapes. Not all of the discussed shapes will be equally likely to be seen during professional matches. However, we believe that by dissecting the philosophies behind the often used restdefence structures were able to give the reader a much better comprehension of restdefence shapes.
Man to man
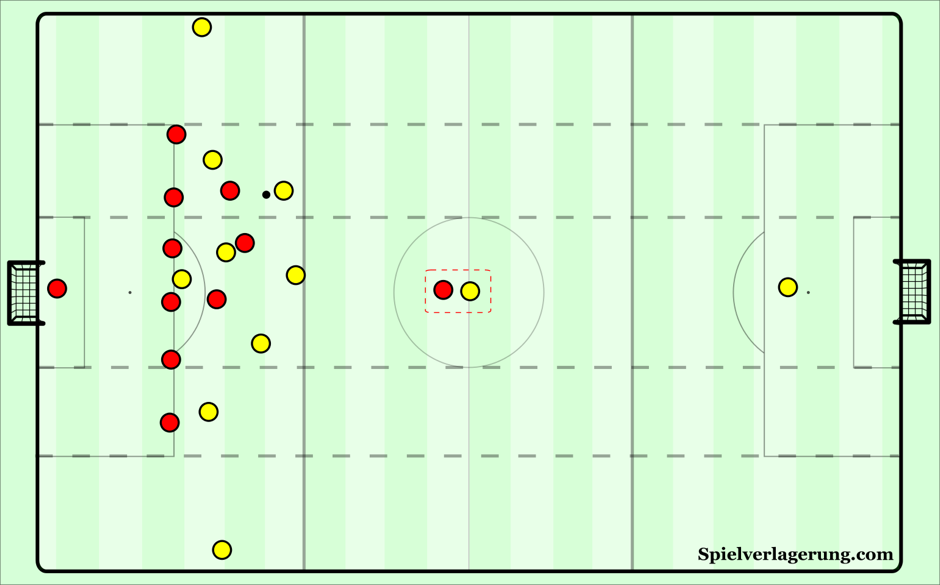
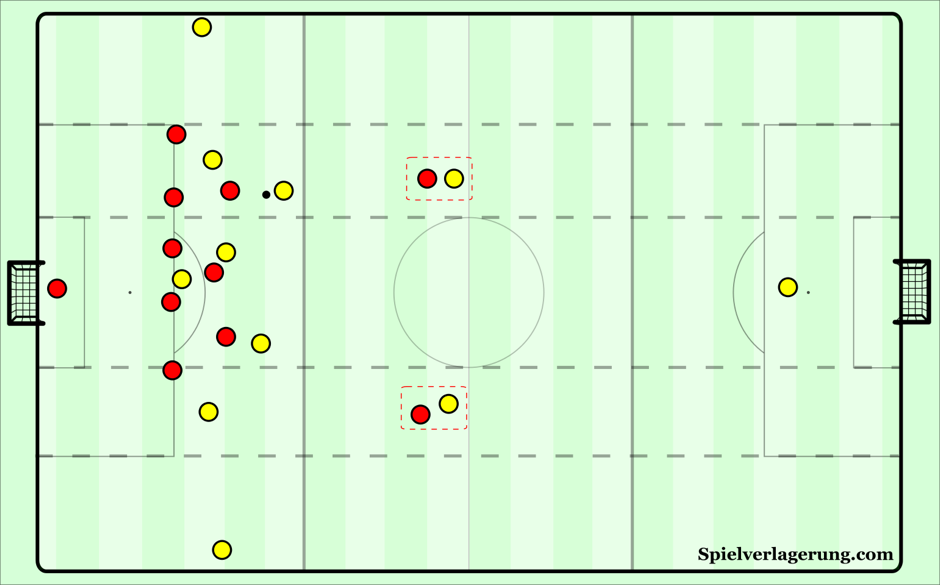
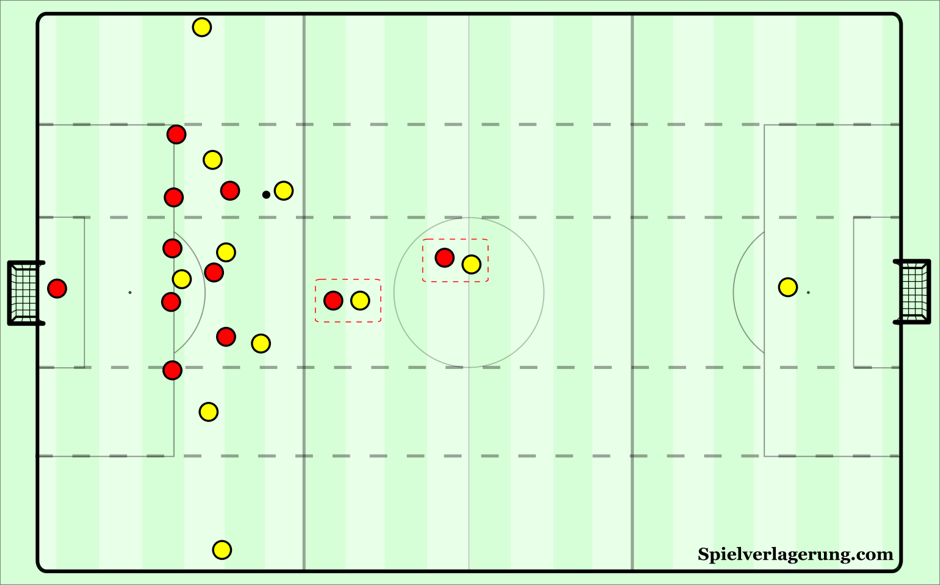
The first restdefence approach is man-to-man. This means that the team goes 1v1 against the restoffense players of the opposition. The number of players that are being used to create the restdefence are therefore also dependent on the number of players the opposition leaves forward. For example, if the opposition leaves three forwards in restoffence, the rest defence will match them numerically. On the one hand this allows the team to attack with equal numbers in higher areas. On the other hand it also means the team leaves quite big spaces when the initial counterpressing isn’t successful.
Just as with a manmarking defensive approach, a man-to-man restdefence structure is by nature, reactive. The position of the defenders is dependent on the position of the attacker. If the attacker decides to position himself on the side instead of the centre the defender will move with him. This can create problems during the defensive transition when the initial counterpressing isn’t sufficient and the defensive team is able to play out of the pressure. Runs can be made from deep positions into the now open space in the centre, which, when not tracked accordingly, can create attacking opportunities for the opposition.Due to the reactivity, the different lines of which such a restdefence is created can differ. When the opposition’s restoffense attackers all move up into higher positions the restdefence can consist of just a first line, with no players positioned in the second line. While the other way around is also possible, however less common due to the counterattacking platforms the opposition wants to maintain. The opposition can also choose to have the restoffense players on different lines, which then creates a restdefense shape with a first and second line.
Man to man against two rest offence players
Man to man against three rest offence players
Against three attackers the man-to-man shape will leave three players back. With three players at the back, the restdefence players start to be able to help another by getting into covering positions once one of the defenders has to press the ball. This means that the initial counterpressing upon losing the ball gets slightly less important as the opposition’s midfielders won’t be able to make runs into the open space that easily anymore. However, the restdefence can still take up rather awkward positions when the restoffense players decide to move elsewhere.
In higher areas the team remains equal numbers to the opposition. As the team now has a 7v7 there, the man-to-man shape can prove itself quite beneficial in order to create chances and retain possession.
Man to man against four rest offence players
Against four restoffense players the man-to-man restdefence will leave back four players. The restdefence shape remains a 1v1 at the back, however as the numbers increase it becomes easier for the defenders to provide cover amongst themselves. Even if they have to start from awkward positions.
In higher areas there is a 6v6. The more players the opposition leaves forward, the more space opens up for the attacking team to create chances from. Therefore it’s highly unlikely that the defending team will leave more than four players up. In those cases the defending team might even chose to leave an underload in the restdefence as the cost-benefit analysis of the situation might mean that creating a 6v5 during the attack is more beneficial than marking all the restoffense attackers. The chances of this situation happening in a real match are very small, as it’s very difficult to form a functional defensive system with six players. Six players aren’t enough to cover the width of the pitch while maintaining pressure on the ball and therefore the defence will be outplayed rather easily.
Role in counterpressing
As previously mentioned, the initial counterpressing is very important for the man-to-man restdefence. Especially when the restdefence consists of less than three players. Because the restdefence keeps equal numbers to the attackers of the opposition, the margin for error is very small. Losing a duel immediately creates an overload for the opposition, while the team is unorganised and there is a lot of space to move into.
Because the team attacks with equal numbers, there are good possibilities of creating overloads in higher areas of the pitch, especially in wide areas as the opposition has to cover the entire width of the pitch. This allows the team to counterpress with a high odds of winning the ball back. However, once the ball is lost while the structure is not in place (for example after a cross is played into the box) and the opposition wins the ball. This restdefence approach can prove quite vulnerable.
Due to the manmarking positions of the defenders, passes into the strikers can be pressed rather aggressively. The main vulnerability here is the third man movement of the oppositions midfielders into the open space between the restdefence and the other players. As the man-to-man shape keeps equal numbers at the back, it’s quite hard to pick up third man runs from joining midfielders, or to press an adjoining midfielder once he receives the ball. As this means leaving the initial marking duty free. It’s also important to consider the tightness of the marking. Tighther marking means means you’re less likely to get an opponent receiving and dribbling at you, but you lose time to react to the movement of the opposition, which allows them to attack the spaces around you. Looser marking means the opponents have more time to receive, but do allow you to adapt to the movement of the attackers and allows you to defend the space better.
In addition, when the team attacks in equal numbers they can decide to either allocate more players to attack the box and thereby force the opposition to pull back players in order to defend the unrushing players. Or, the team can locate them near the edge of the box, in order to have better access to apply aggressive counterpressing as the distances are shorter. Because of these shorter distances, the counterpressing is more aggressive, forcing the player that wins the ball to make a quicker/rushed decision, potentially leading to a unprecise long ball which should be more comfortable for the players at the back.
Role during possession
During possession the advantage is mainly in the maintenance of equal numbers in higher areas. The players who form the restdefence however won’t participate much during the possession stage.
As the restdefence players are man-marking their respective opponents, this means they will be positioned close to that opponent. Therefore, during the possessions stage their positioning prevents them from receiving. In order to receive, the defender would have to move away from his respective marking duty. On one hand it’s questionable if they are able to move away from their mark, receive and pass before the opposition is able to press them due to the short distance the restdefence defender and restoffense attacker have kept from one another.
On the other hand, by creating distance from their opponent, they also disrupt the restdefence shape. As the defender moves away one of the restoffense attackers is able to get free. If the opposition were to win the ball in the adjusting sequence, the defender would be out of position and not able to mark all of the players in the restoffense. Therefore, with a man-to-man restdefence shape, the defenders will look to stay in position and not contribute much during the attacking stage. This in turn can make it difficult to switch the play effectively, which can lead to attacks getting isolated on one side of the field.
Final note on man to man
Man-to-man restdefences make most sense from 2v2 and above, as with more players the far-side defenders are able to provide cover to the players pressing ball. However, when the opposition leave up more than five players, the man-to-man restdefence loses it’s benefits as you lose too many players further up the field. In addition, when the opposition leave just one player up front in the rest offence, teams will usually opt for a different restdefence approach:
Man to man +1
Most coaches don’t want to take the risk of having 1v1 man-marking assignments at the back, and therefore prefer to always maintain a +1 numerical overload in deeper areas. This gives the team more security at the back, as there is now a free defender who’s able to provide cover to the other defenders and the defenders are able to pass over the marking of an attacker when necessary.
The downside to this approach is that you are forced to attack in inferior numbers. By keeping +1 at the back you are automatically forced into a -1 situation further up the pitch, which means you need more movement upfront and need to position your players accordingly to dominate the defensive transition.
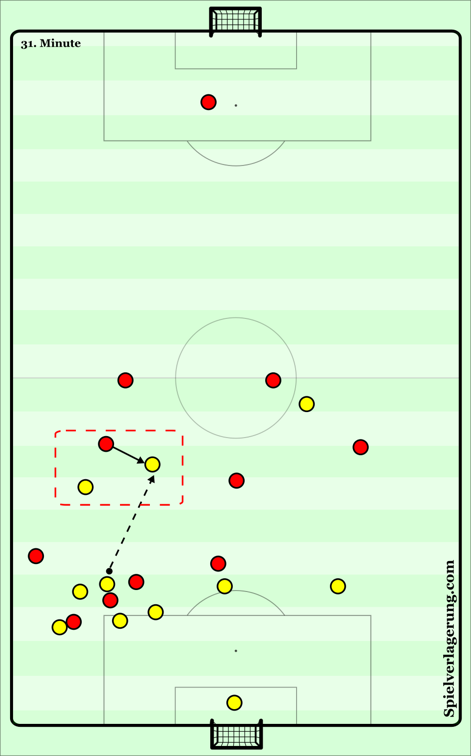
Against one restoffense player the man-to-man +1 shape will leave two defenders in the first line. One of the defenders gets close to man-mark the attacker and the other defender positions himself into a covering position. If the attacker were to move to the other side of the pitch, the defenders switch duties with the other defender now closely marking the striker.
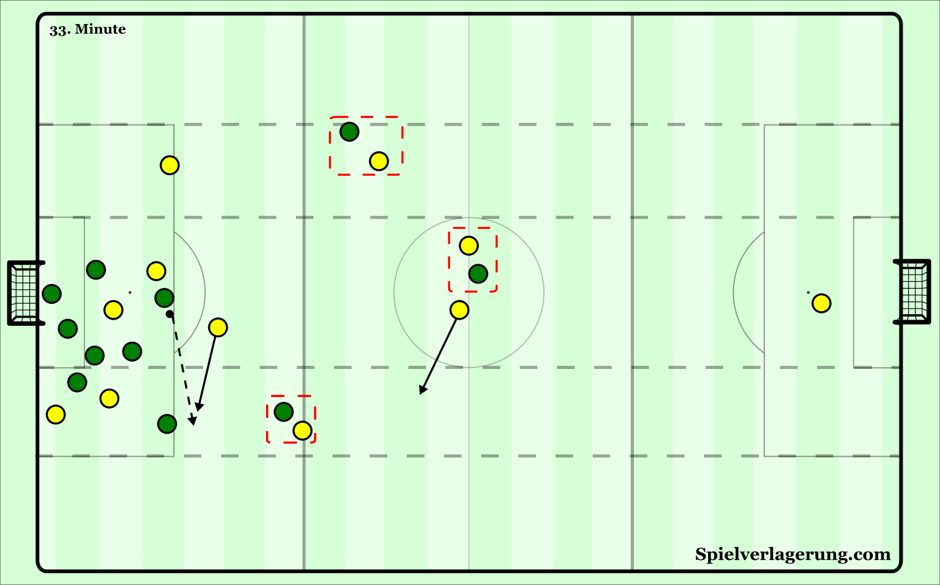
Against two restoffense players the man-to-man+1 shape will leave back three restdefence players. Two players will take on the man-marking duties while the third player will take up a position which allows him to cover both his teammates and the space in the centre. In case the restoffense players both take up wide positions (as shown in the image above) the restdefence will form more of a flat first line without a second restdefence line. The restoffense players can of course also take up positions on different lines, in which case the defenders will adapt their positions.

When this is the case, one of the restdefence players will form a second line by closely marking the slightly dropped attacker. The other two players will form the first line. One of them closely marks the striker while the other one stays in a covering position.
Man to man +1 against 3 rest offence players
Elaborating on the shape against a restoffence of two players, against three attackers the restdefence will form a 1-2-1 (diamond) shape with the player at the top of the diamond now responsible for marking the third striker. This allows the player at the bottom of the diamond to stay in the covering position and defend the spaces behind the other players.
As the player at the top of the diamond is now given the responsibility to mark an opponent, there are potential access problems whenever an opponent now advances with the ball. As we will see in a later section, opponents often try to exploit this to set-up counter attacks.
Because of this a larger emphasis is put on the individual 1v1 defending skills of your defenders. Whenever a free player now advances, this usually entails that one of the players at the back will have to move out to put pressure on the ball, with the free defender having to take over the marking responsibilities. This, in turn, basically creates three 1v1 situations on the last line. As mentioned previously, with three defenders you are able to create an adequate restdefence. However, it is not ideal in terms of spacing and with three defenders it can be hard to provide cover to each defender when they are confronted with an attacker dribbling at them.
This increases the importance of the positioning of the attacking players during the attacking stage. When they take up good positions in relation to the ball, they are immediately able to counterpress which prohibits the opposition from finding a free player who’s able to advance. The players in the second line of the restdefence will usually be positioned around the edge of the box, in order to pick up second balls and be able to immediatly press forwards when losing the ball. When these players aren’t in the right positions the team isn’t able to apply successful counterpressing in the attacking third, which increases the chances of counterattacks being started.
The big advantage of this set-up is, as mentioned before, the number of players you can utilise for attacking positions. By using just four players for your restdefence shape, you have the maximum number of players to be used freely during the attacking stage. Especially when your attacking players are superior to the defenders, this can create beneficial scenarios for you and might force the opponent to pull one of their attackers back to provide more safety.
Depending on the positioning of the attackers, the restdefence can also form a 3-1 or a 2-2 shape.
In this case the three attackers all take up higher positions and are therefore all marked. The fourth (free) player takes up a higher position to form the second line. This allows him to control the ‘6’ space in front of the defence, participate during the build-up and provide initial pressure while taking out the direct passing lanes to the strikers. On the other hand it puts a larger emphasis on the 1v1 defending skills of the players in the first line as there is no cover in the last line, which minimises the room for mistakes.
When the opposition takes up more central positions, the restdefence can also form a 2-2 shape.
A lot of it will depend on where the attacking team leaves their forwards. If they stay very narrow, we have good access to these spaces with decent occupation of the centre and both halfspaces in the 2-2 structure. As both players are positioned in the centre, we have a very good occupation of the central lane as both restdefence players are positioned in the centre. In addition, both players are able to move out to one of the halfspaces. This provides decent acess to these areas in case an opponent breaks out through these spaces.
The defenders need to be able to see the ball and the attacker and be able to drop deeper when necessary while maintaining strong forward pressing access to help them challenge the first touches of the attackers. Staying too close to the attackers could result in bounce passes or dismarking movements to take advantage of one’s position, so it is important there is just enough space between to prevent this but ensure there are optimal distances for pressing access.
However, if the opposition now set up in a wider formation, the 2-2 box shape may be subject to increasing the distances horizontally between the layers. The 2-2 box shape may be subject to change to a diamond/box hybrid (1-2-1 shape). The downside of this is more spaces will generate between players, and the team’s compactness could be weakened, meaning there is possibility for the opposition to use these spaces. Typically, the centre back pairing and pivot will move a bit wider to combat the width of the opposition so there is pressing access in central and flank areas whilst maintaining a strong restdefence. In addition, the defenders should maintain a good body orientation to quickly move back inside to cover these key spaces if the ball-carrier looks to attack through the central channels.
Because of the vast ways to dismark and exploit 1v1 scenarios, the other solution could be to drop into a narrow and compact 3-1 stagger with one of the first line dropping to create a situation back three. If the opposition stay wide, the team can then use shift mechanisms to close the ball down whilst their starting position is more central to cover these key spaces. The downside of the 3-1 shape compared to the 2-2 shape, is that the access during counterpressing is diminished as the first line is now just made up of one player, who won’t be able to cover the entire width of the pitch. The overall advantage to the 2-2 restdefence against three attackers is there are enough players in the final third against the opposition for attacking and counterpressing situations as well as always having the +1 player to deal with the counterattacks.
Counterpressing with man to man +1
The man-to-man+1 shapes make it slightly harder to counterpress in higher areas compared to the man-to-man styles, as there is one less player in a forward position. Therefore, there is one less player who can be used to immediately press the ball during the negative transition. On the other hand, the initial counterpressing also becomes less important compared to the man-to-man shapes as there is a room for error at the back is increased by the covering player.
This disadvantage can, of course, be nullified when the free restdefence player stays close to the attacking unit. For example, when he’s able to position himself near the edge of the box he’s able to immediatly take up a good counterpressing position, which means you will be counterpressing with the same number of players as you would’ve with the man-to-man approach.
The man-to-man+1 shapes do allow the marking restdefence defenders to stay really tight on their respective marks when they are about to receive, while the covering defender is able to take out any passes that are played in behind the defense. Therefore the man-to-man+1 shape can be an ideal shape to counterpress when you have defenders who are solid in 1v1 defending and have a player who’s able to cover the space in behind.
Man to man +1 in possession
As the man-to-man+1 approach has an overload against the restoffense players of the opposition, it can play a role during the possession stage. As the restoffense attackers aren’t able to mark all players at once, a good position of the restdefence players should allow one of them to get free.
By doing this the restdefence players are able to play a role in the redistribution of possession and can act as an outlet for the attacking players.
Zonal
The last way to organise your restdefence is to take up a zonal shape. A zonal restdefence looks to cover certain spaces regardless of the positioning of the opposition’s restoffense, similar to a zonal-orientated defensive approach.
To form a well-structured restdefence, which has an adequate first and second line and is able to participate during the possession stage, it seems at least four players are needed. However, a restdefence of more than five players means that there aren’t enough players left to attack in higher areas which would make the restdefence counterproductive. Therefore, zonal shapes usually consist of either four of five players. The first line is usually made up by central defenders, while the second line consists of either midfielders or fullback (or a centre back when you play with three central defenders).
Zonal shapes will look to cover the halfspaces and centre of the field. As these are the most important spaces to cover during the transition, while it also ensures the restdefence players are able to participate during the possession stage and get into adequate counterpressing positions upon a loss of possession. With the zonal shapes, you can encounter similar shapes to the ones we have seen in the previous sections, as both have similar aims, however in this case the overload will be bigger. Therefore the orientation is now zonal, and not man-to-man+1 for example.
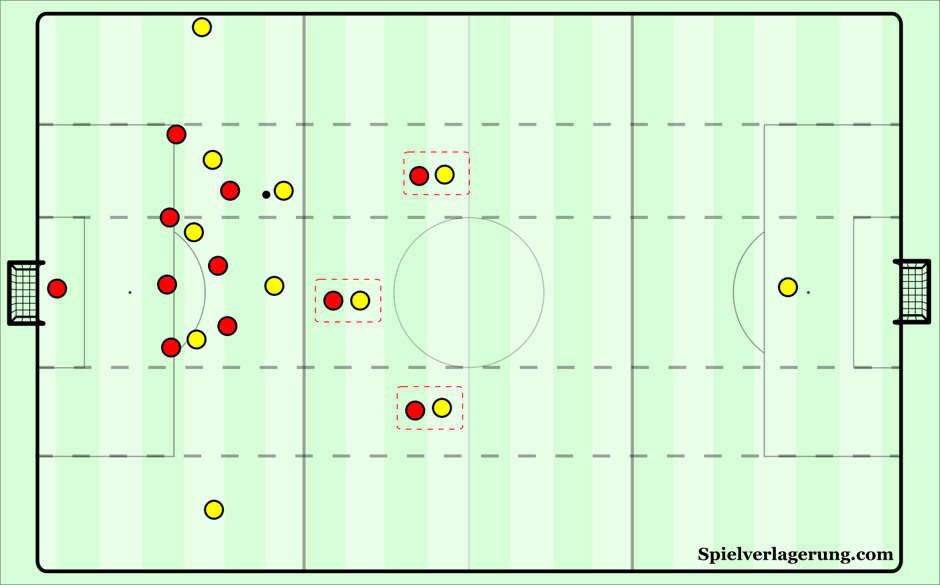
Zonal shapes with four defenders
1-2-1 shape
The most basic zonal restdefence shape is a 1-2-1 shape, usually formed in a diamond. Depending on the behaviours and positioning of the restoffence of the opposition this dynamic can change slightly to a 3-1 or a 1-3 structure.
The 1-2-1 shape allows teams to cover all of the necessary width during the attacking stage, by positioning the wide diamond players in the halfspaces and the two middle players in the centre.
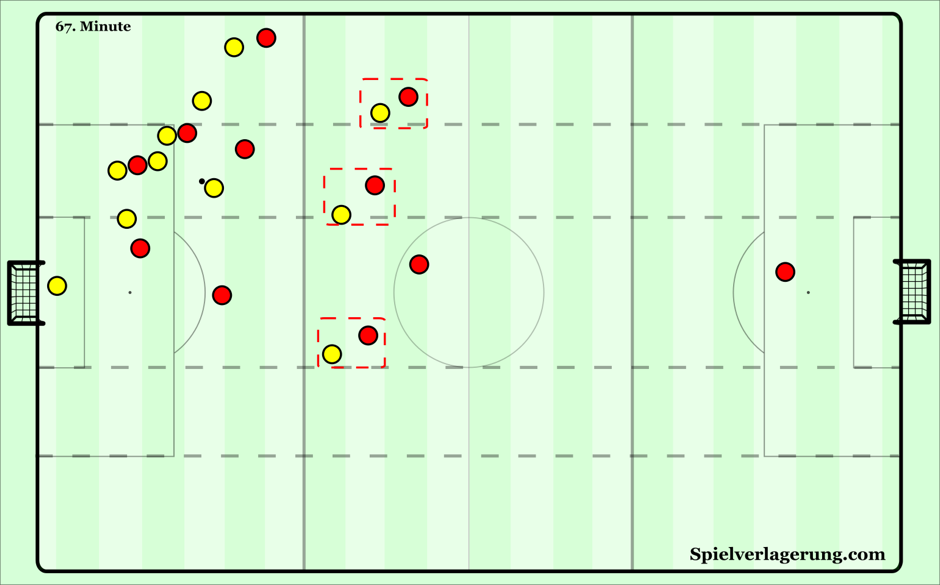
Rest-defence against one attacker
This is not a sight you will see very often, but it still happens nonetheless. Mainly towards the end of matches, as teams try to seek out the victory and commit less players to the restoffence, and more players defensively.
In terms of numbers, the 1-2-1 shape is more than comfortable with dealing with just one attacker. Usually the forward player of the diamond will cover in front of the attacker, ensuring that he can’t receive a pass on the ground by casting an effective cover shadow. The player at the bottom of the diamond can cover the attacker goalside, which should be enough to deal with any immediate danger.
The biggest weak spot against just one striker is the restdefence shape staying too low. As you outnumber the striker 4v1 at the back, this also entails that you are outnumbered 6v9 during the attack. Upon losing the ball this means that the opposition are able to create temporary overloads to play out underneath any initial pressure. When your restdefence shape is not connected with the rest of the team, this allows the opposition to exploit the free space between the two blocks and set-up a counterattack. Meanwhile at the back you won’t need four players to cover just one striker, so an idea could be to pull the far-wide player of the diamond inside and have both him and the player at the bottom of the diamond cover the striker. The player on the ball-side and the player at the top of the diamond are then given licence to move further forwards and create a more well-organised counterpressing shape.
Rest-defence against two attackers
Against two attackers, the 1-2-1 restdefence offers a very well-balanced shape. Usually the two wide players are able to cover the two forwards, leaving the player on the top and bottom of the diamond free to cover their respective zones zonally. This allows the player at the bottom of the diamond to constantly provide cover for the two side players, who are man-marking their opponents. This provides extra stability to the restdefence shape as the defenders aren’t in constant 1v1 situations, which also allows them to be more aggressive in their forward defending.
The player at the top of the diamond is now able to cover the central spaces. Because he is relieved of any direct man-marking assignments, he is able to press opponents who are able to move out of the initial pressure with the ball. Making it more difficult for them to play accurate forward passes.
Counterpressing with the 1-2-1 shape
The advantage of counterpressing with a 1-2-1 restdefence shape is the number of players in the final third. Because you create the restdefence with only four players, you have more numbers in advanced areas who can create a better shape for directly putting pressure on the ball.
The disadvantage of this shape is that there’s only one player in the first line of the restdefence, who’s able to apply direct pressure on the ball carrier. The player is either not able to directly press the ball, or he is able to press the ball but has to leave the centre open. In addition, as discussed in the counterpressing against the 1-2-1 shape, the single player in the first line of the restdefence can easily be overloaded by outbreaking opponents.
Role of the 1-2-1 shape during possession
In possession, the player at the top of the diamond can act as a linkplayer, who’s able to link one side of the pitch to the other by playing a crucial role in switching the play through their strong central presence.
Depending on what side the ball is on, the line of two can always provide a good ‘recycling’ passing lane while they can also see the whole of the pitch due to their body orientation. Another option can be for the line of two to move up and create overloads around the ball to aid the possession. The downside of doing so is that it would leave the restdefence exposed in case the team loses possession, as the restdefence would only be made up by 2-3 other players.
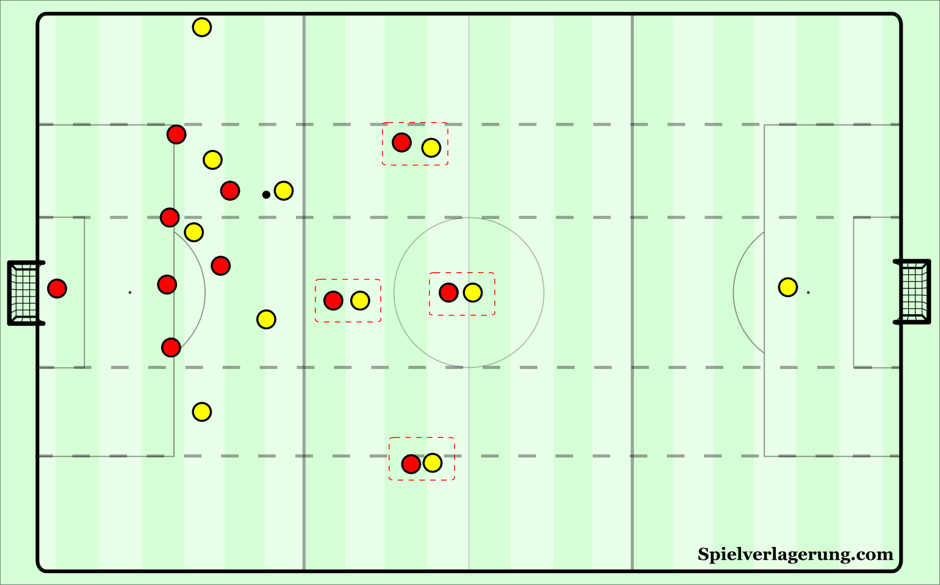
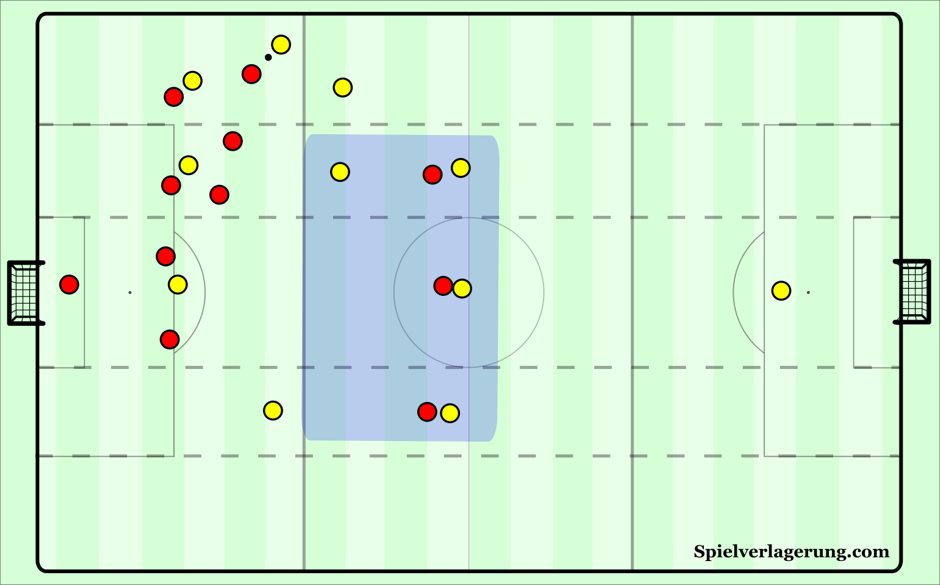
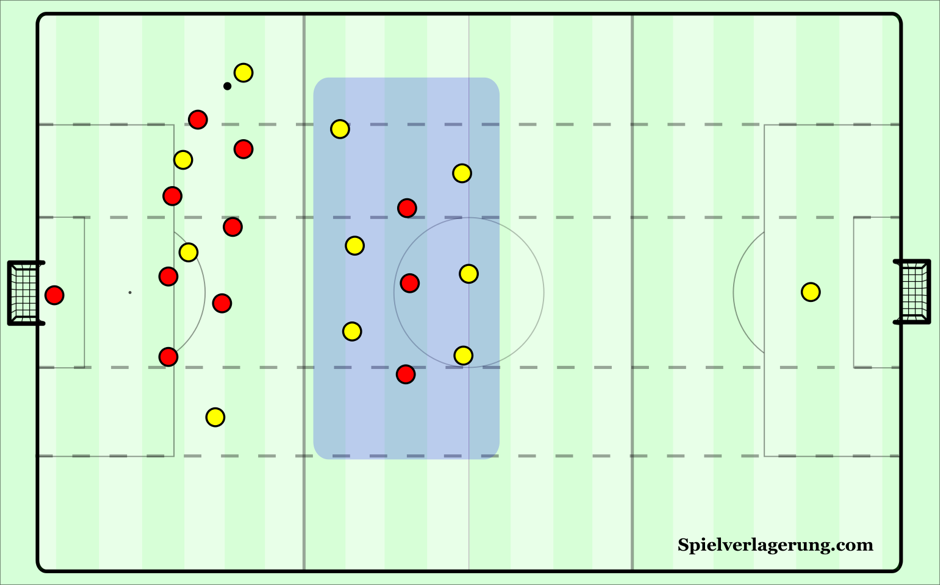
2-2 shape
Another option with four defenders, is to go with a zonal 2-2 ‘box’ shape. The 2-2 shape consists of four players forming the restdefence in a 2-2 stagger.
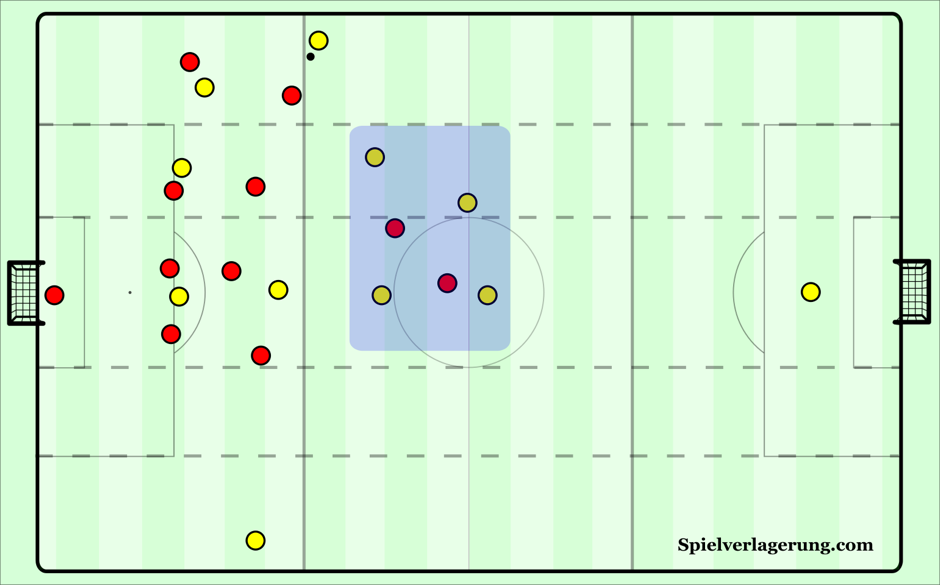
A benefit of this 2-2 box shape is having strong cover positionally in rest positions to control against an opponent’s transition. The restdefence is made up of four players, just as the 1-2-1 shape, and therefore the team can cover a larger part of the field in the attacking stage. With 4 deep players covering the central axis it makes it more difficult for the midfielders of the opponent to counter or connect through the middle if they win the ball back. Compared to the 1-2-1 the 2-2 shape has a stronger central cover because two players are positioned in front of the defensive line, therefore if one of them goes to press the other one can protect/cover the centre.
Rest defence against one attacker
Similar to the 1-2-1 shape, the 2-2 box is unlikely to defend against one attacker. It is important to take into consideration the behaviours of the centrebacks within this 2-2 rest-defence structure. They are in a strong position screened by two supporting players with a 4v1 numerical superiority against the opposition’s attacker out of possession. This secures a clean build-up ‘box’ into the midfield if the ball is won back after an opposition counter because of the strong overload.
Out of possession, they can squeeze onto the attacker if the ball is played into their vicinity with strong coverage from ball-near teammates to fill their space to maintain compaction. This means the restdefence can deal with any balls into just one attacker with a very strong positional balance in the deeper areas.
Rest defence against two attackers
The 2-2 box restdefence maintains great balance against two attackers. Depending on the location of the two attackers, they will either be picked up ‘within’ the box by the centrebacks who are goal side or the pivot who can cover them receiving direct vertical passes into feet with cover shadows. In terms of man marking and zonal assignments, it is very dependent on the attackers starting positions but there will always be at least two players who are free to cover spaces and press forward. In terms of the zones covered, they are relatively free to zonally mark in this instance.
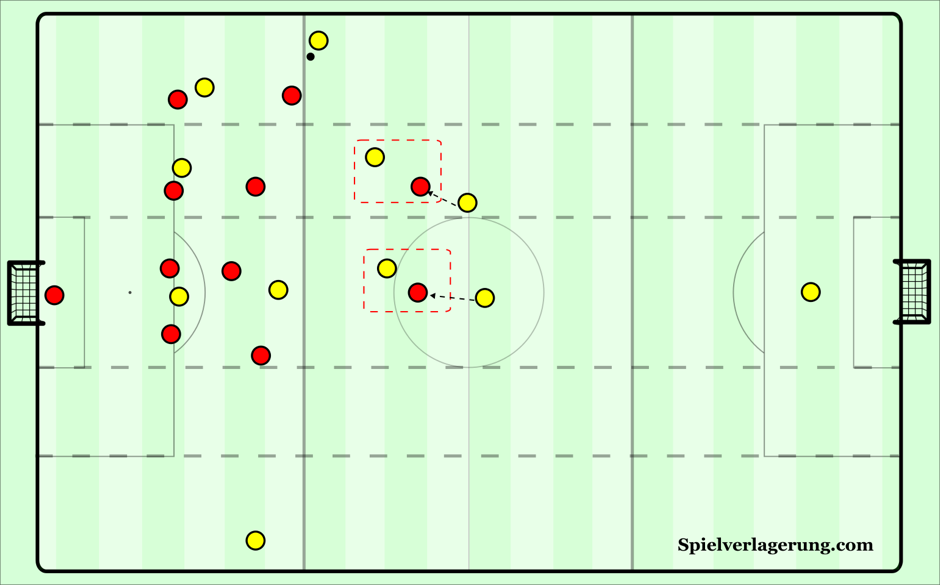
If the attackers move wide, or use dropping movements to try and create passing lines then the ball-near player will have to react. This could be either stepping out of line to apply pressure or simply shifting slightly wider if they move outwards, but not solely engaging with them, just moving enough to maintain access. However, if one player does pressure forwards, this means there is cover to engage with the ball-carrier, and secondary insurance if the first pressure is beaten.
There is still quite a comfortable 4v2 overload, which means they can be aggressive in their forward defending with teammates close by to cover breached spaces, as well as create these overloads in pressing against the potential ball receivers to win the ball back making it difficult for the opposing team to play forward passes into the attackers.
To combat when the opponent keeps one striker in a central position and a player in a wide, winger, position, the 2-2 structure will usually be adapted to a 1-2-1 structure. By keeping the 2-2 shape, this would create awkward positioning. When one of the centre backs moves out it leaves a 1v1 in the centre. When one of the midfielders moves out it creates an asymmetrical shape with very poor access for counterpressing and a lack of accessibility to the far-side.
This 2-2 stagger is mainly zonal marking, where each player covers their own zone and picks up the player within that vicinity, however, there is scope for more ‘rotational’ zonal coverage. This could be when a player is asked to leave their line and engage with opposing movements, and rotations occur to sustain the 2-2 zonal staggering. Depending on the location of the ball, there could be the potential for rotations. An example could be as the defender moves forwards towards the ball to close one of the strikers movements down, the other centreback shifts slightly and one of the pivot can drop into the deepest line of the team to remain in connection with the second centreback, filling one’s vacated base position. The team becomes less disorganised, with each player and passing lanes now covered.
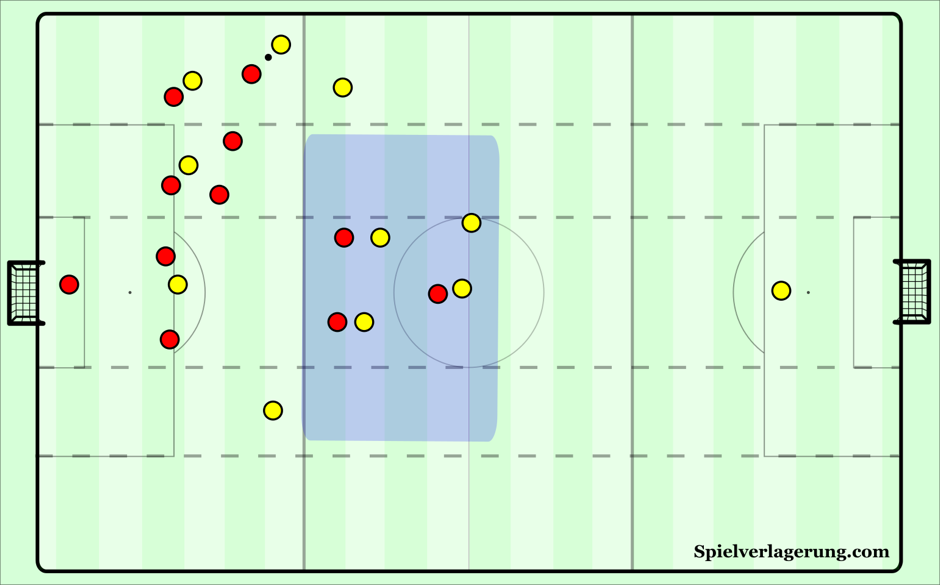
2-2 shape against three rest offence players
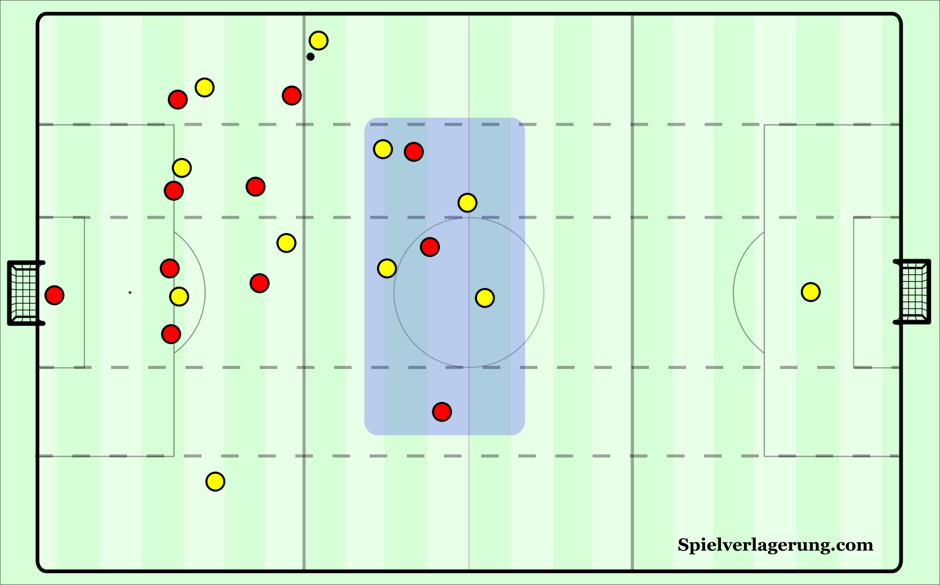
Against three restoffense players a potential problem is that the player on the opposite side moves into a wide position, which means that the zonal 2-2 shape lacks access to this player. This can be fixed by moving into a hybrid 1-2-1 shape, in order to form better access to the restoffense players. However, this does increase the horizontal distance between the restdefence players, making them less compact.
Counterpressing with the 2-2 shape
When looking at how the team’s restdefence structure can enable them to control the opposition transition, you can also look at the counterpressing opportunities it creates. Within the 2-2 structure, there are 4 players behind the ball in their orchestrated positions which is probably the least amount of players your team can sacrifice. Let’s say two or three opposing attackers are stationed higher, this means there are more of our players positioned in the final third, around the ball, to step into their direct counterpressing assignments and reduce the opposition from creating easy overloads to play out from the first phase. Because of the number of players in the attacking phases, the team can look to create overloads in specific areas of the pitch (possibly the ball’s location) to make counterpressing even quicker and more aggressive, knowing the opposition cannot penetrate centrally because of the restdefence.
Despite both structures having 4 players behind the ball, the 2-2 is a bit better than the 1-2-1 because of the 2 players in the first line. The 2-2 shape allows good central access against opposing ball carriers and a free player to press out from the first line to gain territory higher up as they ‘breach’ their line.
Of course there is a disadvantage within this 2-2 structure for counterpressing. Because of the central locations of the players behind the ball it would be very difficult and exhausting for players to cover the width of the pitch. This means, if the counterpressing is in wider areas, the timing of pressure will be too late as the team’s restdefence cannot access wide areas as quickly as the opposition can exploit them, due to the ball travelling faster than any individual player’s movement.
The role of the 2-2 shape in possession
The 2-2 shape has some benefits over a 1-2-1 shape in possession. Because there are two players positioned in the second line of the restdefence, both players positioned in that line are able to form an outlet during possession. Therefore, both wide players are can switch the point of the attack through the restdefence players. In addition, the central positioning allows them to switch across and create temporary overloads around the ball. While the positioning of the players in relation to the wide players invites a lot of diagonal balls to be played, which are more beneficial to progress compared to vertical passes.
For example, in possession, if the ball is played to the left flank as passes between the lines are covered by the opponent’s midfield, the defensive orientation of the opponents will move towards said flank to increase their compactness around the ball. This potentially decreases the pressing access in ball-far areas. Because of the opposition moving towards the ball and moving deeper towards their own goal, this leaves the far restdefence player free.
To exploit this, the team could move the ball against the grain of the opponent’s pressure from the left wing back into the centre, where the ball-holder, in this instance the RB, has time and space. As there is no immediate pressure on the ball due to the lack of pressing access, there is no real desire to rush the next action. Once this player has the information, he can then make a penetrative dribble, switch the ball into 1v1 situations for the RW or make an outside movement to open up diagonal passing lanes back inside to the advanced central midfielder, which uses the benefits of diagonality and gives potential of 3rd man runs from the ball-near winger in behind the last line of defence.
(The RW stays away from the ball, however creates a link to receive the first or second pass, he does this by staying connected to the CM and RB by moving to maintain open passing lines).
However, a weakness of the 2-2 shape during possession can occur when both the central midfielders take up positions in the halfspaces. In those instances, the central defenders don’t have any central options. Which also allows the forwards of the opposition to move further outside and have easier access to the wide areas.
(Excerpt from Manchester United – Villareal (Europa League final). United used a 2-2 shape however this caused them a lack of central presence during the attacking stage).
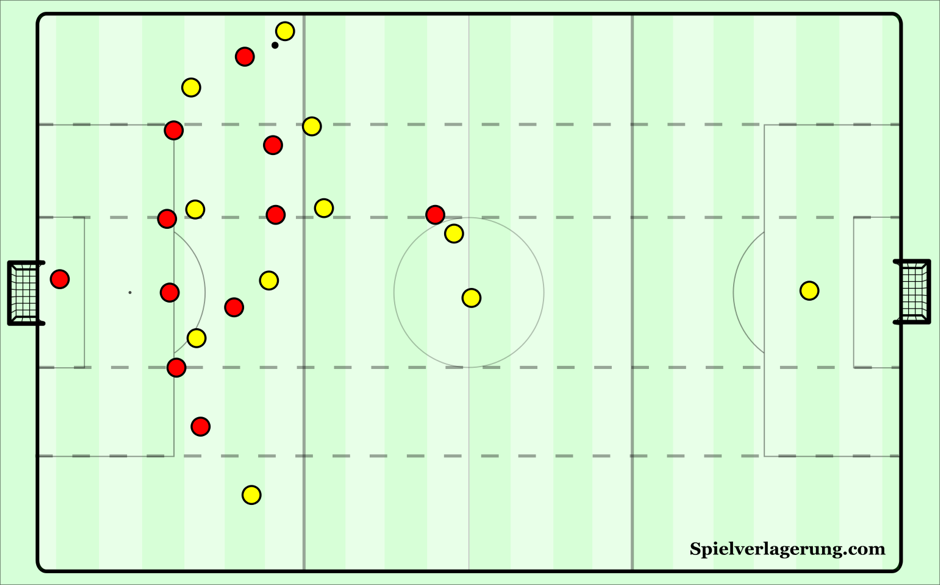
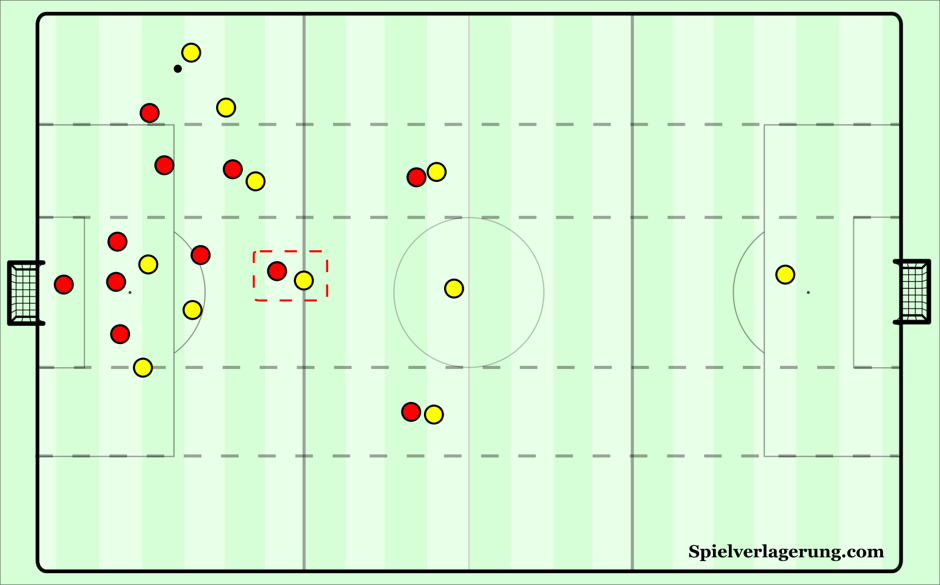
Zonal shapes with five players
A more defensive variation of the 1-2-1/2-2 shape is the 2-3 shape.
The line of three are mainly positioned in the centre and the halfspaces. In coordination with the two central defenders behind the first line, this provides more stability and control against counterattacks. The line of three is able to cover the entire width of the pitch in order to directly apply pressure upon losing the ball. While the line of two in behind ensures that there is always cover in the central areas. It therefore combines the width of the 1-2-1- shape with the central cover of the 2-2 shape.
By playing with two in the last line, the number of 1v1 situations is vastly diminished. While the positioning of the line of three provides good access to press the initial ball carrier when the opponents win the possession without disrupting the stability of the structure.
The application of the 2-3 shape can also vary. It can be used in the more counterpressing sense, in which the team tries to win the ball back as quickly as possible, by having the line of three press aggressively forwards upon turnovers. This shape lends itself quite well for this application, as the positioning of the line of three allows quick reactions to the opposition player winning the ball, regardless of where the opposition won the ball.
Another option can be to have the middle player in the line of three press the opponent who wins the ball, with the players on the side immediately falling back to create a situational four at the back again, allowing the team to cover the full width of the pitch during a potential counter attack.
The downside of the 2-3 structure in comparison to the 1-2-1/2-2 structure is, of course, the retention of one more player in deeper areas of the field. This results in less players able to join the attacking stage and therefore, less players who can be used to create chances and score goals. However, on the other side, it also allows one of the players from the restdefence to leave the shape and join the attack whenever necessary, without violating the structure too much. As four players are still staying behind, a proper restdefence can still be created. This usually results in an asymmetrical 2-2 shape, with one of the line of three joining the attack.

Rest offence against one attacker
A very rare sight. Most teams will look to keep up more than one player in the restoffence, and when just one player is kept forward the 2-3 structure might not be the most ideal set-up because of the intense overload. Using five players to cover one player might be a bit much and will disable the teams attacking play through an underload higher up. When the 2-3 is used it will usually result in the line of three being positioned very far forward to focus on counterpressing and to help aid the ball circulation in higher areas. The two central defenders covering the lone striker through good dynamics, with one of them being tight on the attacker and one providing cover.
Rest offence against two attackers
In this type of situation, the opponents usually look to keep their striker and one of their wingers in a forward position. The striker will stay as high as possible, with the winger being in a lower position. This can either be on the same side as the striker, or on the opposite side to try and stretch the restdefence.
Due to the relative stability the 2-3 structure provides, the defensive team will be able to cover zones and not worry too much about the positioning of the attackers. One of the side-players in the line of three can flexibly mark the winger, and one of the centre backs is able to get tight on the striker. Because the defensive team has an extra central defender in the last line, 1v1 situations will hardly be created allowing the defenders to be quite aggressive in their marking.
Restdefence against three strikers
Against three strikers the positioning of the players is relatively similar to that of the 1-2-1 shape. The players on the sides and one of the central defenders are responsible for marking the opposing players. This leaves the middle player of the line of three free to press the player on the ball.
The difference is made by the positioning of the second central defender in the last line. Whereas with the 1-2-1 shape this is one defender, there are now two, which provides more security at the back and allows the team to provide more cover for the players on the side.
Usually the central defender on the side of the ball will provide cover to the player on the side, while the far-central defender marks the striker.
The crux is, of course, that the opposition’s players aren’t always positioned this ‘nicely’. The opposition can also have one of the three attackers in the centre or have both of them on one side even. When this is the case, it is counterproductive for the defenders to get tight to one of the attackers, as this would leave players free or create a very lopsided structure which in turn diminishes the access to the player on the ball during counterpressing.
In these situations, the defenders will mainly keep their zone with the defender who has multiple attackers to deal with taking up an option-orientated position.
Counterpressing with the 2-3 shape
In spite of the position of the ball, the 2-3 shape has great access for counterpressing. As the line of three is positioned in halfspace-centre-halfspace, they are always able to provide immediate pressure on the ball-carrier, while also being located in the strategically most important areas of the field.
The downside of counterpressing with a 2-3 shape, compared to the 1-2-1 shape, is that there are less players in the final third who can apply direct pressure on the ball upon losing it, which can allow the opposition to create overloads and get out of the initial pressure.
The role of the 2-3 shape during possession
Because of the halfspace-centre-halfspace positioning, the first line of the restdefence is positioned ideally for recycling possession and creating ball-side overloads. Because of the number of players used to create the restdefence, the structure also allows the team to have one of the players move out of the restdefence shape, while maintaining a balanced restdefence. An example of this could be that one of the players joins the attack after a switch of play with over- and underlapping runs, similar to Kyle Walker’s role under Pep Guardiola at Manchester City.
The 3-2 shape
The 3-2 shape is a more defensive variant of the 2-3 shape. An extra player is positioned in the last line at the expense of a player in the second line. This shape is often seen by teams who play with three central defenders and two wingbacks. When that is the case, the 3-2 is quite a natural restdefence structure with the three centre backs in the last line, and two central midfielders just in front.

Because the 3-2 structure uses three players to cover the width of the last line it offers more defensive security than the 2-3 structure. On the other side the structure provides less opportunities for successful counterpressing as there is less direct access to the ball due to the line of two. Especially when one of the two midfielders has to move out to an opponent who’s positioned in the restoffense, this can create access and compaction problems.
In comparison to the 1-2-1 shape, the 3-2 shape has the same benefit as the 2-3 shape, by organising the restdefence with five players you create extra stability at the back. One of the players can move out of the restdefence shape without the structure falling apart. The 3-2 shape in particular quite easily morphs into the 1-2-1/3-1 shape when one of the players moves further forward to boast the restdefences flexibility depending on the situation.
Against one player in the rest offence
The 3-2 shape has a huge overload against one restoffense player, similar to the 2-3 shape. Therefore this is again not a situation you’ll often encounter. In case it is used, the line of two will position themselves much more forward and the player from the first restdefence line on the side of the ball will move to make himself available as a passing option. Basically resulting in a restdefence of two players who are tasked with marking the striker.
Against two players in the rest offence
Depending on the organisation of the restoffense, either the two “side-defenders” will adopt man-marking assignments against the two attackers, or one of them will be marked by one of the midfielders with the defender covering space. Similar to the 1-2-1 shape.
Against three players in the rest offence
This seems to be the more common option against this type of restdefence. Usually, one of the two midfielders will already move very close to an opposition’s player who might become dangerous during a counter attack. This allows the team to keep the 3-1 structure at the back, while also diminishing the threat of a counter attack actually being set-up through the midfielders initial movements, breaching their line and adding pressure.
Counterpressing with the 3-2 shape
The first line of the restdefence is able to be quite aggressive in their marking and pressing as they can provide cover for each other. An example of this could be that one of the two players moves out quite aggressively to stop a player from receiving the ball in transition while the other one moves more centrally to maintain compaction.
The downside of the 3-2 shape, compared to the 2-3 shape, is that there are only two players in the first line of the restdefence. Therefore there is less immediate access in wide areas to the ball-carrier during transition phases, while the line of two can also be overloaded more easily by outbreaking players.
The role of the 3-2 shape in possession
The two players in the first line of the restdefence can act as outlets to recycle possession and switch the play. In addition, one of the players from the second line can move into the first line and create a 2-3 shape and jump further forwards from there. This is especially fruitful when the opposition leave just two attackers up front, as this would create a 5v2 overload at the back which is something of an overkill.
Lastly, the 3-2 shape also allows players to move away from the restdefence into an attacking position to create overloads or gain territory, while still maintaining a balanced restdefence shape, similar to the 2-3 shape.
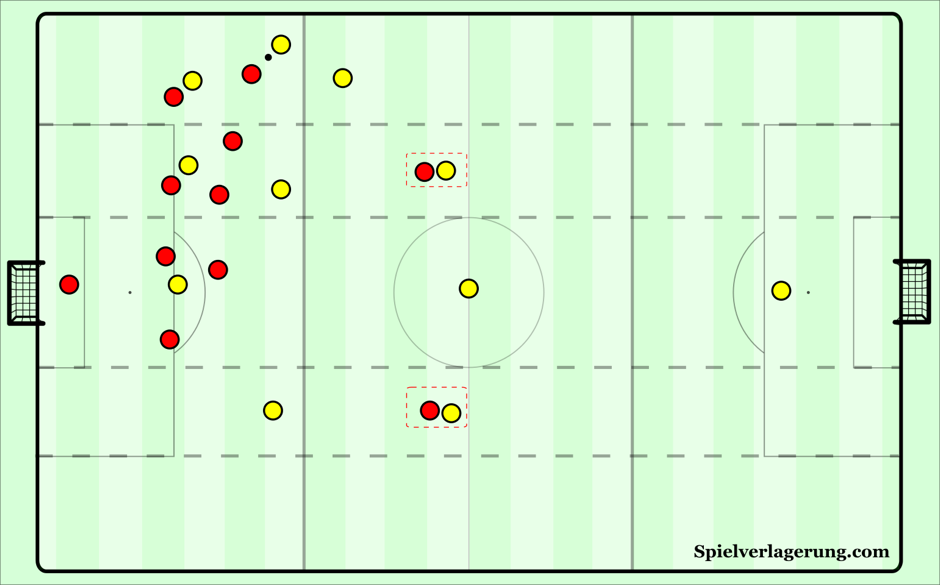
Zonal shapes with six defenders
As mentioned at the start of this section, restdefences with more than five players are highly unusual as it means sacrificing a lot of players in advanced positions. However, especially near the end of a match when a team is defending a lead, it can still happen.
The 2-4 shape is the more defensive variant of the 2-3 shape. Instead of having three players positioned in the second line of the restdefence there are now four players positioned there. With the 2-3 shape, the opposition will often look to create the 2v1 against the middle player in the line of three. By positioning an extra player in the line of the restdefence, you limit the chances of this happening. In addition, a line of four players are enough to cover the whole width of the pitch. Therefore the restdefence should be able to get pressure on the initial ball carrier to stop or at least slow down any potential counter attacks.
The downside to positioning an extra player in the restdefence is that you limit your opportunities during the attacking stage, as you have now just four players in attacking positions. In addition, you will have less opportunities for directly pressing the ball upon losing it. As there are less players positioned in positions directly around the ball. Because of this, the 2-4 shape is mainly used when teams start to play more defensively in the final stages of a game in which they try to preserve a win.
Another defensive variant of the 2-3/3-2 shape is the 3-3 restdefence. Instead of placing an extra player in the first line, the extra player is positioned in the second line of the restdefence to add extra defensive stability. On the one hand this allows us to apply pressure in central and flank areas with good coverage of the width of the pitch. No matter on where the opponent tries to set-up the counter attack, there is access by the first line and cover from the second line of the restdefence. On the other hand, by playing six players behind the ball, there aren’t enough players in the final third to create sustaining attacks or to apply immediate pressure upon losing the ball. Therefore the chances of the opposition to get out of our pressure do increase, because of the natural overload they are able to create.
Both of these shapes won’t be the starting restdefence shape for most teams. As these shapes provide more defensive security, but less attacking options and less pressure on the ball upon losing it. These formations are mainly used during the final stages of a game, where one team is trying to defend a lead.
Final remark
In this first part, we looked into the different ways to set-up a restdefence and the advantages and disadvantages to these different styles. In part two we will look at restdefences from the opposition’s point of view and look at how you can create effective counterattacking patterns against the different restdefence approaches.
Written by Evert van Zoelen and Chris Baker
4 Kommentare Alle anzeigen
Dumi August 11, 2022 um 10:48 am
What software are you using for painting this situations?
Emmanuel August 18, 2022 um 12:43 am
Inkscape
Minerva Hornby August 8, 2021 um 11:46 am
I know this if off topic but I’m looking into starting my own blog and was wondering what all is needed to get set up? I’m assuming having a blog like yours would cost a pretty penny? I’m not very web savvy so I’m not 100 certain. Any recommendations or advice would be greatly appreciated. Cheers
CT July 9, 2021 um 10:42 am
Wow thanks for this amazing article!
I have 2 questions:
1) How would you rate a restdefence man to man +1 against one striker with the striker sandwitched by the 2 defenders (so one stays infront of the striker and the other one behind him)? I played this approach as a player with my team to defend transitions after set-pieces.
2) Which approach would you say has Spain used during the EUROS? I think probably something like a 4-1 or 2-3. Because of the deep fullbacks, but they stayed very wide during their attacking phases. This was probably sometimes a problem due to the lack of access with only one player on the second line (Busquets). But I believe sometimes the players in the halfspaces (Pedri and Koke) played more defensively to encounter the lack of access.